
A while ago, I came across this great little grass covered box for hiding chargers for your gadgets, but when I tried to buy one, they were not on sale anymore.
I’m unsure why. Maybe this is a really bad idea that will melt the box as soon as too many gadgets are put in there, or maybe they just went bankrupt.
Whatever the cause, I decided I wanted one for myself, so instead of buying it, I built one.
DISCLAIMER: If you build this box yourself, and something happens, I’m not accountable. Mine has worked fine so far, but you never know.
What you need:
- IKEA Pluggis box with lid
- Plastic flower patches – I found mine in Tiger.dk (Google search for similar product).
- EVA Foam 2mm sheet (in Danish “mosgummi”) – I found mine in Panduro Hobby (Google search for similar product)
- USB multi charger – I found mine on Amazon.co.uk (Google search for similar product)
- Powerstrip – I had one lying around (Google search for similar product)
- Tools to drill out holes in box
How you do it:
1) Drill out the holes in the Pluggis box
The holes in the lid need to be big enough for a USB plug, and the holes in the bottom need to be big enough for a power plug:

I put the big holes on the bottom, so I can get the power-plug through and still have a small nice looking hole on the side:

2) Cut out the EVA foam, cut holes for USB cables, and then staple on the flower patches
Ok, I admit I did this without taking too many pictures of the process, but it is fairly simple. Cut out the EVA foam to fit into the depression in the Pluggis box lid, cut the holes for the USB cables and then staple on the flower patches.
I had to detach the flowers and cut the grid under the flowers a bit to make it fit.


3) Pull the USB cables through the holes in the foam and lid
This is the step where it makes sense to have cut the holes to USB plug size.
Most plugs are smaller than USB, but a few, like the old iPad/iPhone plugs are larger, so if you’ve cut them all to USB size, you’ll be fine no matter what.


4) Put the USB multi-charger inside the Pluggis box and attach the cables
This is the simplest part, just plug everything in.
In my charger there was USB plugs for iPad, iPhone, Android, etc., The difference in those are the Wattage you get, so it shouldn’t destroy your gadgets if you mix them up. Your iPad will just charge really slow, or not at all, if it’s in a USB plug with too little charge.


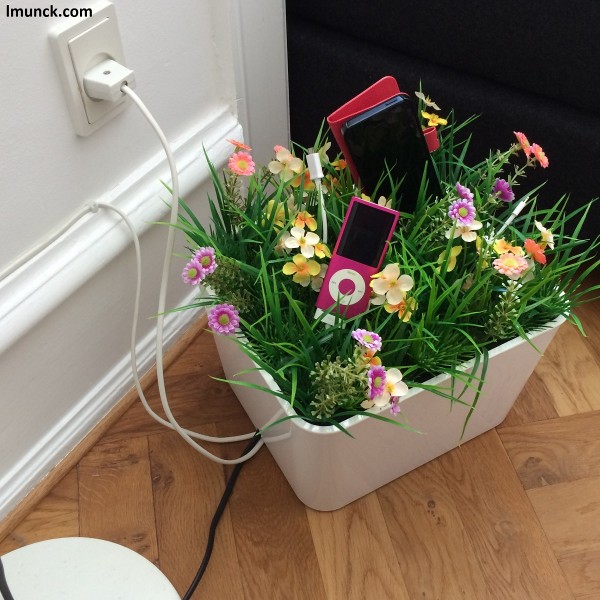
5) Setting up your new box
Once the box is done, find a good spot for it. I put mine by a lamp next to our couch and easy-chair, so I could hide the power chords I had on the floor before, and have charging conveniently handy for when I’m reading.
